Hi everyone!
Just a spoiler alert... I will be posting a couple Christmas cards today! I know, I know, it's still early, but don't hate me just yet! Despite the fact the weather has been absurdly beautiful this October, the month is almost over. Then comes November, then comes December! I know that if you're like me, you'll have an insanely busy November and early December, so why not get those cards done now?? It will save you time in the long run and you'll be so proud you got them done early; saving time for more important things like visiting friends and family this coming season.
Here are a couple cards I made which will be featured in my November Christmas Card class (please contact me for more details).
This one features the Gifts of Christmas stamp set. It was stamped in Versamark ink then sprinkled with silver embossing powder and heat set. It was mounted on old Xmas patterned paper, but you can use any old stuff you have handy. Then a sparkly knotted bow was added diagonally and anchored behind the patterned paper panel. I also added 3 cute mini brads in the lower right corner. Then the whole thing was mounted on a Not Quite Navy standard sized card panel.
This card uses an old hostess set called Patterned Pines - which is still one of my favorites! The trees are inked up with individual markers in Baja Breeze, Chocolate Chip and Island Indigo (a new In Colour!). I used 3 assorted silver brads to top the trees, then double matted the trees on Baja and Indigo paper leaving 1/8" border. This fits perfectly into the frame created by the Tulip Border embossing folder which was used on the Chocolate Chip card base.
Hope you enjoyed a little sneak peek at next class! Best wishes on your Christmas crafting!
Showing posts with label Card. Show all posts
Wednesday, October 26, 2011
Wednesday, October 5, 2011
The Flu's of Fall!
Hi everyone!
Sorry for the delay in not posting! I was really busy in the last half of September. I had a great time at my first card class with 8 wonderful gals. We made 6 awesome cards and had lots of fun. The rest of September was spent prepping for a tradeshow in a neighbouring town. It was my first time to this town for Stampin’ Up!, so it was great to meet new people and find new customers. A little boy was so excited to find a truck card for his grandpa, it was adorable.
Anyhow, I wanted to share a card today that is very current to what’s happening in my life! First of all, I absolutely LOVE fall; the colours, the crispy leaves, the chilled breeze, the excitement of oncoming holidays! But….while I’ve been lucky enough to avoid the seasonal coughs/colds/flus, many of my friends have gotten bugs and have been under the weather (even though the weather is unseasonally warm here! It’s like June!). This inspired me to make a get well card with a fall theme.
I used Soft Suede cardstock as a base for my card. I used the Leaves #2 die and my Big Shot to cut out different leaves in the colours of Pool Party, More Mustard and Soft Suede. These colours coordinate with the Spice Cake designer series paper that I used. To make the texture, you glue the leaves to the patterned paper panel then run the whole thing through the Big Shot with the Lattice embossing folder. It creates an inlaid embossing look. I anchored the panel to the base with 4 Mustard brads then added the “get well wishes” sentiment from Teeny Tiny Wishes.
I hope you and your families are not suffering any of these fall flus. It’s far too beautiful outside to be sick!
Take care!
Sorry for the delay in not posting! I was really busy in the last half of September. I had a great time at my first card class with 8 wonderful gals. We made 6 awesome cards and had lots of fun. The rest of September was spent prepping for a tradeshow in a neighbouring town. It was my first time to this town for Stampin’ Up!, so it was great to meet new people and find new customers. A little boy was so excited to find a truck card for his grandpa, it was adorable.
Anyhow, I wanted to share a card today that is very current to what’s happening in my life! First of all, I absolutely LOVE fall; the colours, the crispy leaves, the chilled breeze, the excitement of oncoming holidays! But….while I’ve been lucky enough to avoid the seasonal coughs/colds/flus, many of my friends have gotten bugs and have been under the weather (even though the weather is unseasonally warm here! It’s like June!). This inspired me to make a get well card with a fall theme.
I used Soft Suede cardstock as a base for my card. I used the Leaves #2 die and my Big Shot to cut out different leaves in the colours of Pool Party, More Mustard and Soft Suede. These colours coordinate with the Spice Cake designer series paper that I used. To make the texture, you glue the leaves to the patterned paper panel then run the whole thing through the Big Shot with the Lattice embossing folder. It creates an inlaid embossing look. I anchored the panel to the base with 4 Mustard brads then added the “get well wishes” sentiment from Teeny Tiny Wishes.
I hope you and your families are not suffering any of these fall flus. It’s far too beautiful outside to be sick!
Take care!
Saturday, July 30, 2011
Sweet Floral is my New Favorite!
Hi everyone!
Hope this beautiful summer day finds you well...it's so nice out here today. I just wanted to share a quick card before I'm off to go swim at my friend's pool.

This background stamp is one of the new ones that made an appearance July 1st with the new catalogue release. It's called Sweet Floral and it is so elegant.
Here I've made the card base from Blushing Bride cardstock. Then inked up the Sweet Floral stamp with Staz On black ink and stamped on vellum. It's very important to use Staz On when stamping on vellum or other less porous surfaces so it won't smudge. Once the ink dried, I flipped over the vellum piece and simply used Stampin' Write Markers to colour it from behind. Then the vellum was attached to a same-sized piece of retired Night & Day DSP. Instead of using my special invisible vellum glue, I just used a mini brad in each corner to adhere the layers.
The sentiment is from the Hostess only set "Tagtastic". It goes great with punches of course!
Hope you liked it! Oh, and one more thing before I go. I wanted to introduce my blog helper...
Her name is Kitty Kitty or KiKi for short. I think she's actually more of a hinderance than a help since I have to type all this stuff one handed.
But she loves hanging out with me at the computer so I feel bad to kick her off.
Bye everyone!
From Charlene & KiKi
Hope this beautiful summer day finds you well...it's so nice out here today. I just wanted to share a quick card before I'm off to go swim at my friend's pool.
This background stamp is one of the new ones that made an appearance July 1st with the new catalogue release. It's called Sweet Floral and it is so elegant.
Here I've made the card base from Blushing Bride cardstock. Then inked up the Sweet Floral stamp with Staz On black ink and stamped on vellum. It's very important to use Staz On when stamping on vellum or other less porous surfaces so it won't smudge. Once the ink dried, I flipped over the vellum piece and simply used Stampin' Write Markers to colour it from behind. Then the vellum was attached to a same-sized piece of retired Night & Day DSP. Instead of using my special invisible vellum glue, I just used a mini brad in each corner to adhere the layers.
The sentiment is from the Hostess only set "Tagtastic". It goes great with punches of course!
Hope you liked it! Oh, and one more thing before I go. I wanted to introduce my blog helper...
Her name is Kitty Kitty or KiKi for short. I think she's actually more of a hinderance than a help since I have to type all this stuff one handed.
But she loves hanging out with me at the computer so I feel bad to kick her off.
Bye everyone!
From Charlene & KiKi
Labels:
Card,
cat,
congratulations,
kitty,
Sweet Floral,
wedding
Wednesday, July 27, 2011
NEW STUFF!!!
Hi friends!
I am SOOO excited that I got a chance to play with my new catalogue goodies tonight. My new favorite products are part of the Domestic Goddess Suite. It's such a cute, cool, retro suite - you'll love it. Here are a couple cards I made using the products:
This card uses the new "In Colour" Calypso Coral as a base. Then I covered most of the card in the Domestic Goddess DSP. The top edge of DSP is covered with Pool Party 3/8" Ruffled Ribbon.
I used the Big Shot to cut the long tag from the Two Tags die. Then I stamped the ironing board from the House & Home stamp set. The Thanks sentiment is from the exclusive hostess-only set Tagtastic.
The new hostess benefits are so flexible - you earn hostess dollars which you can spend on exclusive lower priced hostess sets, or any other merchandise from the catalogue. You can even earn items up to 50% off. Contact me today to learn more about hostess benefits!

This card was made pretty much the same as the first, except I used the other tag from the Two Tags die and anchored the closure with an adorable new Mini Clothespin.
The front of the tag is stamped with coloured images from the Now You're Cookin' single stamp.
When you pinch the clothespin off the tag, the sentiment is revealed....
Hope you enjoyed these cards and new products.
Remember, you can get this DSP and these stamp sets at a great discount when you sign up for the $119 starter kit! Besides a pack of DSP and 2 stamp sets, you also get 4 ink pads, cardstock, notecards, ribbon, blender pen, acrylic block and Snail glue runner! You'll also receive all the supplies and instructions to make a very cute and fancy Christmas keepsake box ($50 value).
There is only a few days left until this promo is over! Contact me before July 31st!

This is the Christmas Keepsake box that you will get to make if you sign up for the $119 deal!
C'mon...you know you want it!
Hope you like!
I am SOOO excited that I got a chance to play with my new catalogue goodies tonight. My new favorite products are part of the Domestic Goddess Suite. It's such a cute, cool, retro suite - you'll love it. Here are a couple cards I made using the products:
This card uses the new "In Colour" Calypso Coral as a base. Then I covered most of the card in the Domestic Goddess DSP. The top edge of DSP is covered with Pool Party 3/8" Ruffled Ribbon.
I used the Big Shot to cut the long tag from the Two Tags die. Then I stamped the ironing board from the House & Home stamp set. The Thanks sentiment is from the exclusive hostess-only set Tagtastic.
The new hostess benefits are so flexible - you earn hostess dollars which you can spend on exclusive lower priced hostess sets, or any other merchandise from the catalogue. You can even earn items up to 50% off. Contact me today to learn more about hostess benefits!
This card was made pretty much the same as the first, except I used the other tag from the Two Tags die and anchored the closure with an adorable new Mini Clothespin.
The front of the tag is stamped with coloured images from the Now You're Cookin' single stamp.
When you pinch the clothespin off the tag, the sentiment is revealed....
Hope you enjoyed these cards and new products.
Remember, you can get this DSP and these stamp sets at a great discount when you sign up for the $119 starter kit! Besides a pack of DSP and 2 stamp sets, you also get 4 ink pads, cardstock, notecards, ribbon, blender pen, acrylic block and Snail glue runner! You'll also receive all the supplies and instructions to make a very cute and fancy Christmas keepsake box ($50 value).
There is only a few days left until this promo is over! Contact me before July 31st!

This is the Christmas Keepsake box that you will get to make if you sign up for the $119 deal!
C'mon...you know you want it!
Hope you like!
Tuesday, June 21, 2011
Goodbye, Hello!
Hi everyone!
The paradoxical title comes from this month's news - the Last Chance list is out as well as the July catalogue sneak peeks (for demos anyway!).
The Last Chance list is where you can find a list of all the stamps and accessories that will not be carried over from the current catalogue to the new catalogue on July 1st. If you have some favorites on your wishlist, now is the time to get them before they're gone for good! Click the button on the right sidebar to go there now.
One of the many perks of being a Stampin' Up! demonstrator is that we get to purchase sneak peek products before they're even available to or seen by the general public! I've ordered myself some of the newest papers and stamps from the Sneak Peek and I got a free copy of the new catalogue with my order! Being a demo rocks!
Here are a couple cards I made using items from Sneak Peek:
This one is a get well card that features the new Lace Ribbon border punch. It makes a very stylish and delicate border. Here, I've punched it out of Concord Crush then threaded 3/8" white tafetta ribbon through it.
The Designer Series Paper (DSP) you see here is also new and it's called Pocketful of Posies. It's my new favorite - it's whimsical, it's retro-mod, it's eclectic....I just love it!
The base colour of this card you may notice is different...No it's not the old Lavender....it's a brand new In Colour from the 2011-2013 colours and it's called Wisteria Wonder. There are 4 other new yummy In Colours added to the current 5, making a total of 10 In Colours to play with!
There is a matching stamp set that makes the little rain drops and it's called "My Friend".
I've used the "My Friend" set again for the sentiment on this simple card.
Then I adhered 3 squares of the lovely Pocketful of Posies DSP and bordered it with Chocolate Chip and another new In Colour "Pool Party".
A couple buttons faux threaded using a tiny strip of white paper and voila! Done!
I hope you enjoyed your special sneak peek at some of these new products.
I'm enjoying my new catalogue so much - looking through, making my wishlist, imagining how the new stuff will work so well with my current stuff! Ahhh June is a great month here at Stampin' Up!
To get your hands on a new catalogue, contact me to host your own New Catalogue Party! As a hostess you will get a free catalogue plus all of us will have a blast seeing some new products and making something to take home!
Hope you like!
The paradoxical title comes from this month's news - the Last Chance list is out as well as the July catalogue sneak peeks (for demos anyway!).
The Last Chance list is where you can find a list of all the stamps and accessories that will not be carried over from the current catalogue to the new catalogue on July 1st. If you have some favorites on your wishlist, now is the time to get them before they're gone for good! Click the button on the right sidebar to go there now.
One of the many perks of being a Stampin' Up! demonstrator is that we get to purchase sneak peek products before they're even available to or seen by the general public! I've ordered myself some of the newest papers and stamps from the Sneak Peek and I got a free copy of the new catalogue with my order! Being a demo rocks!
Here are a couple cards I made using items from Sneak Peek:
This one is a get well card that features the new Lace Ribbon border punch. It makes a very stylish and delicate border. Here, I've punched it out of Concord Crush then threaded 3/8" white tafetta ribbon through it.
The Designer Series Paper (DSP) you see here is also new and it's called Pocketful of Posies. It's my new favorite - it's whimsical, it's retro-mod, it's eclectic....I just love it!
The base colour of this card you may notice is different...No it's not the old Lavender....it's a brand new In Colour from the 2011-2013 colours and it's called Wisteria Wonder. There are 4 other new yummy In Colours added to the current 5, making a total of 10 In Colours to play with!
There is a matching stamp set that makes the little rain drops and it's called "My Friend".
I've used the "My Friend" set again for the sentiment on this simple card.
Then I adhered 3 squares of the lovely Pocketful of Posies DSP and bordered it with Chocolate Chip and another new In Colour "Pool Party".
A couple buttons faux threaded using a tiny strip of white paper and voila! Done!
I hope you enjoyed your special sneak peek at some of these new products.
I'm enjoying my new catalogue so much - looking through, making my wishlist, imagining how the new stuff will work so well with my current stuff! Ahhh June is a great month here at Stampin' Up!
To get your hands on a new catalogue, contact me to host your own New Catalogue Party! As a hostess you will get a free catalogue plus all of us will have a blast seeing some new products and making something to take home!
Hope you like!
Thursday, June 2, 2011
Bad News / Good News (a.k.a. Out with the Old, In with the New!)
Hi everyone,
Well....another month long absence from the blogosphere! Let's just say between personal life, work life and a ginormous flood all across Manitoba, it was a very busy month of May!
I'd like to just take a quick break from my regularly scheduled programming to say that I am so impressed with my fellow Manitobans and so proud to be part of such a great, big, giving community. The Flood of 2011 has been so stressful, especially where I work. It also affected our family personally as well. My parents', grandma's, and aunt and uncle's house were all in the "danger zone". I've only been alive 24 years and never in that time have we ever had to worry about flood water; it simply didn't occur in our area. But this year was different. A one in 300 year event occured where the cresting of both rivers happened so close together, combined with major snow storms late in the year, plus weeks of rain...it was a recipe for disaster. Our Province and community made national headlines for weeks. People put their lives on hold to go protect their houses, their family's houses, move their belongings and livestock, find places to stay in event of evacuation.... It's been so busy and stressful that sometimes you forget to stand back and look at the good that is happening.
When I drove down the main street in my little town, it was taken over by a giant row of sandbags, nearly 10 feet tall. The Canadian Forces, along with just about every able-bodied person in the village, were loading these sandbags into homeowner's trucks and trailers. We gathered up friends and neighbours to help sandbag around my grandma's house and my heart just swelled. All these people donating their time and muscles, everyone in the community pulling together. This was (and is still) happening all across Manitoba, not just in my little community! The flood is by no means over, even though the threat level has dropped considerably in my area, it's moved on further north now. To get a visual of how things looked nearby a week or so ago, this is a living complex off one of our major highways:
Those 2 little dark blobs are people and they are walking across a home made bridge of pallets that are floating on waist high water. It is nuts here! So now that you know why I've spent so much time away from the craft room and computer, let's move on!
So for today's blog post I have bad news and good news for you guys... Bad news first, always.
June 1st marked the day that the Last Chance List came out. This is a listing of all the items in the current catalogue that will not be available when the new catalogue launches on July 1st. This means if any of these stamps or accessories are on your wish list, you have less than 1 month to purchase them! Check to see if any of your favorites are on limited time availability!
This next card I think is really fun! I used to think monochromatic cards were boring, but as you can see, I'm on a monocolour kick now!
This one is Daffodil Delight and the super cute white patterned DSP is from *NEW* paper that is featured in the summer mini and it's called "Beyond the Garden". Besides yellow it also has vibrant Wasabi, Melon, Pacific Point and Tangerine colours.
The two flowers are stamped from the coordinating set "Fabulous Florets".
Happy spring! To my fellow flood buds, stay high & dry!
Well....another month long absence from the blogosphere! Let's just say between personal life, work life and a ginormous flood all across Manitoba, it was a very busy month of May!
I'd like to just take a quick break from my regularly scheduled programming to say that I am so impressed with my fellow Manitobans and so proud to be part of such a great, big, giving community. The Flood of 2011 has been so stressful, especially where I work. It also affected our family personally as well. My parents', grandma's, and aunt and uncle's house were all in the "danger zone". I've only been alive 24 years and never in that time have we ever had to worry about flood water; it simply didn't occur in our area. But this year was different. A one in 300 year event occured where the cresting of both rivers happened so close together, combined with major snow storms late in the year, plus weeks of rain...it was a recipe for disaster. Our Province and community made national headlines for weeks. People put their lives on hold to go protect their houses, their family's houses, move their belongings and livestock, find places to stay in event of evacuation.... It's been so busy and stressful that sometimes you forget to stand back and look at the good that is happening.
When I drove down the main street in my little town, it was taken over by a giant row of sandbags, nearly 10 feet tall. The Canadian Forces, along with just about every able-bodied person in the village, were loading these sandbags into homeowner's trucks and trailers. We gathered up friends and neighbours to help sandbag around my grandma's house and my heart just swelled. All these people donating their time and muscles, everyone in the community pulling together. This was (and is still) happening all across Manitoba, not just in my little community! The flood is by no means over, even though the threat level has dropped considerably in my area, it's moved on further north now. To get a visual of how things looked nearby a week or so ago, this is a living complex off one of our major highways:
So for today's blog post I have bad news and good news for you guys... Bad news first, always.
June 1st marked the day that the Last Chance List came out. This is a listing of all the items in the current catalogue that will not be available when the new catalogue launches on July 1st. This means if any of these stamps or accessories are on your wish list, you have less than 1 month to purchase them! Check to see if any of your favorites are on limited time availability!
Good news is that the new catalogue is coming on July 1st and I promise you, based on the super-secret, demo-only sneak peek I have seen, IT WILL BE AWESOME!!! I can almost taste the yumminess emanating from the 5 new In Colours that will be added to this year's In Colours. That's right, in July you will now have 10 In Colours to use to augment our regular 40 colour collection! Also, the designer series paper is totally rockin'! It is fresh - or is it phresh?! I can't wait to get my hands on it and I know you'll feel the same.
Despite the flood, I did manage to make some awesome Mother's Day cards! Take a peek:
This one uses Concord Crush as a base and Perfect Plum as accent colour. The large flower is made by putting the Fun Flowers die through the Big Shot, then slightly curling the leaves for dimension. The little rose was made by using Julie William's tutorial - isn't it gorgeous!
The flower is anchored with an Antique Brad - so pretty! The sentiment is from Teeny Tiny Wishes (my go-to stamp set for almost every card) and is stamped on a die cut from the Lots of Tags dies.
This one is Daffodil Delight and the super cute white patterned DSP is from *NEW* paper that is featured in the summer mini and it's called "Beyond the Garden". Besides yellow it also has vibrant Wasabi, Melon, Pacific Point and Tangerine colours.
The two flowers are stamped from the coordinating set "Fabulous Florets".
I just love the new summer mini stuff! If you'd like to see more of it, book a party and I'll be sure to show off some awesome new projects you can do!
Happy spring! To my fellow flood buds, stay high & dry!
Sunday, May 1, 2011
Back after a busy stretch...
Hi everyone!
I had a really busy month - I can't believe it's been so long since my last post! I was sad to see the end of Sale-a-Bration, but May always brings awesome promos. Sure enough, this year you can 30% off various scrapbooking related products, including professional prints from My Digital Studio. Check out the link on my sidebar to the right.
I will post a couple cards today...Even though I've been busy away from the blogosphere, doesn't mean I haven't been crafting! I had a tradeshow last night as part of a Ladies Night event in my hometown. It was great fun - lots of vendors, prizes, food and even a pole dance demo! The surprise of the evening was the blizzard that came out of nowhere. Yeesh, last day of April and we got dumped on at least another 6 or 7 inches.
This card is special because it shows you a sneak peek at some *new* DSP that will be coming out in the new catalogue on July 1st. It's called Paisley Petals and it's great! On this card, I tore the edge of the DSP and rolled it down a bit, then distressed with Burgundy ink on a sponge. The flower is punched from Cherry Cobbler using the XL Fancy Flower Punch and is sponged with Burgundy again. There are 3 brads - the big one is from Antique Brads and the 2 small ones at the bottom are from Vintage Trinkets. The sentiment is stamped from my favorite go-to set, Teeny Tiny Wishes.
This card also showcases some new paper and stamps. The Summer Mini Catalogue is out and it is great! There's some fun summer stuff, nautical stuff, Canada stuff, but my very favorite so far is the floral stuff.
This card uses Tangerine Tango as a base, then the bottom half was covered in the new paper Beyond the Garden. This paper has bright fun colours like Wild Wasabi, Melon Mambo, Daffodil Delight, Pacific Point and as mentioned, Tangerine Tango. It's gorgeous but bright and fun too!
The yellow flowers and the sentiment are from the same set: "Fabulous Florets". It coordinates with the DSP mentioned above. It's my new favorite set and I really hope we carry it over into the new Idea Book & Catalogue in July.
But just in case, you better get yours now!
I had a really busy month - I can't believe it's been so long since my last post! I was sad to see the end of Sale-a-Bration, but May always brings awesome promos. Sure enough, this year you can 30% off various scrapbooking related products, including professional prints from My Digital Studio. Check out the link on my sidebar to the right.
I will post a couple cards today...Even though I've been busy away from the blogosphere, doesn't mean I haven't been crafting! I had a tradeshow last night as part of a Ladies Night event in my hometown. It was great fun - lots of vendors, prizes, food and even a pole dance demo! The surprise of the evening was the blizzard that came out of nowhere. Yeesh, last day of April and we got dumped on at least another 6 or 7 inches.
This card uses Tangerine Tango as a base, then the bottom half was covered in the new paper Beyond the Garden. This paper has bright fun colours like Wild Wasabi, Melon Mambo, Daffodil Delight, Pacific Point and as mentioned, Tangerine Tango. It's gorgeous but bright and fun too!
The yellow flowers and the sentiment are from the same set: "Fabulous Florets". It coordinates with the DSP mentioned above. It's my new favorite set and I really hope we carry it over into the new Idea Book & Catalogue in July.
But just in case, you better get yours now!
Hope you like!
Sunday, March 20, 2011
Sale-a-Bration ending soon...
Since there's only 11 days left of Sale-a-Bration, I thought I'd post a few cards that I made using some of the FREE stuff you can earn! And if that doesn't convince you, I don't know...!
This card features 3 different SAB picks. The first is the scalloped "for you" flower stamp. It's from the free set "Punch Bunch". All of the images in that set are perfectly coordinated with various punches.
The polkadot scalloped circle was punched out from the Ice Cream Parlour designer paper & quick accents pack. It has 9 sheets of patterned paper as well as 2 full 12x12 sheets of self-adhesive diecuts.
The third SAB item is the cute ribbon which is from the Ice Cream Parlour Ribbon & Buttons pack. It's nice these 2 SAB items coordinate - makes cardmaking "easy peasy"!
The swirl is from the Bliss set and it makes anything look elegant! The paper is from "Lap of Luxury" collection. I decorated with a little bit of bling too!
This card was another super easy but still very cute card to make. The background is done with the large Woodgrain stamp. Then I punched out scalloped squares from some scraps I had hanging around my stamping table. On the Tangerine Tango piece, first I stamped the happy birthday sentiment from the free SAB set "Punch Bunch" (mentioned above), then I punched it out using the scallop square.
The pink and yellow buttons are also free SAB items. They are from the aforementioned Ice Cream Parlour Ribbon & Button pack. They're adorable little shiny things and you get 48 of them AND a 15 yard roll of the ribbon I showed you in the first card! I'd call that a deal for sure!
Perhaps the neatest SAB offer I've seen in a while is the My Digital Studio content CD. Basically they digitized ALL the SAB choices and put them on a disc for use with MDS. I've installed the disc of images, now I'm just having 'play time' with them. I hope to show you something I made with it soon!
Hope you liked!
Monday, February 28, 2011
Bliss Bliss Bliss!!!!
Hi everyone!
Tonight's card is truly elegant - thanks to the work of everyone's new favorite stamp set: Bliss. Seriously, it's been super popular since it came out.
Part of its popularity likely stems from the fact it's FREE! It's one of the Sale-a-Bration stamps that you can earn for free with your purchase of $60 or party of $395.
The background of this card is stamped using the flourish from Bliss repeatedly in the same colour ink as the cardstock (Close to Cocoa). It gives a nice "watermarked" tone-on-tone look.
The scallop is from a Big Shot die and after cutting, I spritzed it with water and crumpled it up to age / distress it. The "Thinking of You" sentiment is from Bird on a Branch.
Possibly my favorite part about this card is the embellishments. The vintage Victoria lace was the perfect addition to the top of the card. It is all finished off with one of my very favorite new things in the Occasions Mini - "Vintage Flower Adornments". They come in Rose Red, Baja Breeze & Very Vanilla and they are so cute I wish I could wear them! Oh well, my cards like wearing them too! ;)
That's all for tonight! Hope you like :)
SAB ends March 31st, so if you'd like to get your hands on Bliss, better act fast!
Tonight's card is truly elegant - thanks to the work of everyone's new favorite stamp set: Bliss. Seriously, it's been super popular since it came out.
Part of its popularity likely stems from the fact it's FREE! It's one of the Sale-a-Bration stamps that you can earn for free with your purchase of $60 or party of $395.
The background of this card is stamped using the flourish from Bliss repeatedly in the same colour ink as the cardstock (Close to Cocoa). It gives a nice "watermarked" tone-on-tone look.
The scallop is from a Big Shot die and after cutting, I spritzed it with water and crumpled it up to age / distress it. The "Thinking of You" sentiment is from Bird on a Branch.
Possibly my favorite part about this card is the embellishments. The vintage Victoria lace was the perfect addition to the top of the card. It is all finished off with one of my very favorite new things in the Occasions Mini - "Vintage Flower Adornments". They come in Rose Red, Baja Breeze & Very Vanilla and they are so cute I wish I could wear them! Oh well, my cards like wearing them too! ;)
That's all for tonight! Hope you like :)
SAB ends March 31st, so if you'd like to get your hands on Bliss, better act fast!
Friday, February 4, 2011
Tis The Season!
Hi everyone,
Apparently it IS the season...not Christmas, but weddings! I guess I don't really know much about weddings, or why there even is a season...but I figure there is. It's all over the ads in the paper, photographers are popping up everywhere, there are huge conventions to showcase a whole bunch of wedding stuff!
I'm certainly glad I'm not planning one, ha ha. Looks like a lot of work! I am, however, content to make a whole bunch of cards for weddings! Here are a few I've done lately:
This one was inspired by a card in the Card Creations: Favorite Occasions vol.2 magazine by Maile Belles. I used a classic stamp set called "Fifth Avenue Floral" - it's really pretty and versatile. Good for either line art, like you see here, or watercolouring, or layering/collaging.
The ribbon is retired, it's Kiwi Kiss coloured. I stocked up on it because it was such a favorite of mine.
My favorite part of this card is obviously the tiny little crown hanging from the ribbon. They are known as Trinket Crowns and can be found on Pg.24 of the Occasions Mini Catalogue. They are so gorgeous - you can use them on cards or (if you have a hard time giving them away) you can use the included jump rings to attach them to a bracelet or necklace chain. They would work perfectly on the Simply Adorned line of jewelery that Stampin' Up offers.
This one here was super easy to make using just cardstock, the Big Shot, a stamp set and a couple simple embellishments.
The background is embossed with a swirly embossing folder through the Big Shot machine. Then I cut one of the tags from the Two Tags die using the Big Shot. Conveniently, the scallop circle punch fits in it perfectly.
Around the base of the black tag, I tied a small length of Very Vanilla satin ribbon then hot-glue-gunned one of my favorite new embellishments to it - Vintage Flower Adornments. They are so adorable and come in a package of 24 - assorted colours of Very Vanilla, Baja Breeze and Rose Red.
Hope you like!
And if there are any brides out there gearing up for your big day - congratulations and best wishes!!! :)
Apparently it IS the season...not Christmas, but weddings! I guess I don't really know much about weddings, or why there even is a season...but I figure there is. It's all over the ads in the paper, photographers are popping up everywhere, there are huge conventions to showcase a whole bunch of wedding stuff!
I'm certainly glad I'm not planning one, ha ha. Looks like a lot of work! I am, however, content to make a whole bunch of cards for weddings! Here are a few I've done lately:
This one was inspired by a card in the Card Creations: Favorite Occasions vol.2 magazine by Maile Belles. I used a classic stamp set called "Fifth Avenue Floral" - it's really pretty and versatile. Good for either line art, like you see here, or watercolouring, or layering/collaging.
The ribbon is retired, it's Kiwi Kiss coloured. I stocked up on it because it was such a favorite of mine.
My favorite part of this card is obviously the tiny little crown hanging from the ribbon. They are known as Trinket Crowns and can be found on Pg.24 of the Occasions Mini Catalogue. They are so gorgeous - you can use them on cards or (if you have a hard time giving them away) you can use the included jump rings to attach them to a bracelet or necklace chain. They would work perfectly on the Simply Adorned line of jewelery that Stampin' Up offers.
This one here was super easy to make using just cardstock, the Big Shot, a stamp set and a couple simple embellishments.
The background is embossed with a swirly embossing folder through the Big Shot machine. Then I cut one of the tags from the Two Tags die using the Big Shot. Conveniently, the scallop circle punch fits in it perfectly.
Around the base of the black tag, I tied a small length of Very Vanilla satin ribbon then hot-glue-gunned one of my favorite new embellishments to it - Vintage Flower Adornments. They are so adorable and come in a package of 24 - assorted colours of Very Vanilla, Baja Breeze and Rose Red.
Hope you like!
And if there are any brides out there gearing up for your big day - congratulations and best wishes!!! :)
Sunday, January 23, 2011
Take a Spin with me!
Hi everyone!
What a cold weekend - it's been the perfect excuse to stay indoors and play with my favorite toys :) This next card showcases one of Stampin' Up!'s newest toys: spinner wheels! It brings me back to childhood memories of board games with friends.
The stamp set for this card is from the new Occasions Mini Catalogue and it's called "Take a Spin". It has 4 different wheels you stamp, then attached a game spinner head to. The spinners are also found in the new Mini. They're super easy to use - just poke hole, layer the spinner, a washer and then anchor it with a brad.
It makes for a really fun, interesting and interactive card! It would also be great for interactive scrapbook pages.
The paper I used is called Thoroughly Modern. It is retired now, but I swore that in the New Year I would stop hoarding my retired papers and actually use them. I have way too much and hate to see it just sitting there. So although it's unavailable, there are many more fantastic Stampin' Up! designer series paper sets. I'm going through all my old to make room for more new!
Hope you like :)
What a cold weekend - it's been the perfect excuse to stay indoors and play with my favorite toys :) This next card showcases one of Stampin' Up!'s newest toys: spinner wheels! It brings me back to childhood memories of board games with friends.
The stamp set for this card is from the new Occasions Mini Catalogue and it's called "Take a Spin". It has 4 different wheels you stamp, then attached a game spinner head to. The spinners are also found in the new Mini. They're super easy to use - just poke hole, layer the spinner, a washer and then anchor it with a brad.
It makes for a really fun, interesting and interactive card! It would also be great for interactive scrapbook pages.
The paper I used is called Thoroughly Modern. It is retired now, but I swore that in the New Year I would stop hoarding my retired papers and actually use them. I have way too much and hate to see it just sitting there. So although it's unavailable, there are many more fantastic Stampin' Up! designer series paper sets. I'm going through all my old to make room for more new!
Hope you like :)
Wednesday, January 19, 2011
Another cupcake for you!
Hi everyone,
I won't type a whole bunch because even my arms are shaking from a great fitness class I had tonight...I'm just afraid I won't be able to get out of bed in the a.m. haha
I just think the Build a Cupcake punch is the coolest thing ever! The matching stamp set Create a Cupcake makes it simple to jazz up your creations as well. For this one, I used Soft Suede ink to stamp the muffin liner onto the punch out. I also meticulously coloured each dot on the polkadots a different colour and do I ever love how it turned out - just like rainbow sprinkles! Who doesn't love rainbow sprinkles! The little cherry is also a punch out from the same punch. I then just coloured it with markers.
That's it, that's all - hope you like!
I won't type a whole bunch because even my arms are shaking from a great fitness class I had tonight...I'm just afraid I won't be able to get out of bed in the a.m. haha
I just think the Build a Cupcake punch is the coolest thing ever! The matching stamp set Create a Cupcake makes it simple to jazz up your creations as well. For this one, I used Soft Suede ink to stamp the muffin liner onto the punch out. I also meticulously coloured each dot on the polkadots a different colour and do I ever love how it turned out - just like rainbow sprinkles! Who doesn't love rainbow sprinkles! The little cherry is also a punch out from the same punch. I then just coloured it with markers.
That's it, that's all - hope you like!
Thursday, January 6, 2011
Occasions Mini is here!!!
Hi everyone!
January is here and that means the Occasions Mini is also here! It's packed with great stuff; I'm having a blast playing with my new stuff. I also can't wait to show you guys how to use the products at a workshop/home party. There's a really great sewing line, botanical line, vintage floral line, etc. I could go on, but it would take forever. Contact me to get your hands on a real copy or check out the PDF from my sidebar here or from my website.
Here is a card I made using some really innovative new products in the mini.
The sentiment (and matching sentiment inside, which you can't see) is from the set called "Create-a-Cupcake". The cupcake in the circle is actually not a stamp! It's a .... PUNCH! Gotta love this punch - it makes the cupcake base, frosted top, a cherry and a candle! To decorate the top of the cupcake, I used a heart from a different punch this time though. The sprinkles are from a little stamp that is also party of the Create-a-Cupcake set. I love that you could make any colour sprinkles you want, or even stamp multiple times in different colours for the multicoloured sprinkles!
It's a really versatile and easy way to make embellishments. If you want to see it in action - book a workshop with me & you'll get to play with lots of my goodies!
The patterned paper is not from the mini, but it is still current and you can find it in the big catalogue (Sweet and Sour DSP). The ribbon is (unfortunately) retired, but I couldn't resist using it because of the polkadots!
Hope you like :)
January is here and that means the Occasions Mini is also here! It's packed with great stuff; I'm having a blast playing with my new stuff. I also can't wait to show you guys how to use the products at a workshop/home party. There's a really great sewing line, botanical line, vintage floral line, etc. I could go on, but it would take forever. Contact me to get your hands on a real copy or check out the PDF from my sidebar here or from my website.
Here is a card I made using some really innovative new products in the mini.
The sentiment (and matching sentiment inside, which you can't see) is from the set called "Create-a-Cupcake". The cupcake in the circle is actually not a stamp! It's a .... PUNCH! Gotta love this punch - it makes the cupcake base, frosted top, a cherry and a candle! To decorate the top of the cupcake, I used a heart from a different punch this time though. The sprinkles are from a little stamp that is also party of the Create-a-Cupcake set. I love that you could make any colour sprinkles you want, or even stamp multiple times in different colours for the multicoloured sprinkles!
It's a really versatile and easy way to make embellishments. If you want to see it in action - book a workshop with me & you'll get to play with lots of my goodies!
The patterned paper is not from the mini, but it is still current and you can find it in the big catalogue (Sweet and Sour DSP). The ribbon is (unfortunately) retired, but I couldn't resist using it because of the polkadots!
Hope you like :)
Monday, December 20, 2010
Back again!
Hi everyone!
Sorry I haven't posted in so long - I have been super busy, but in a good way. I found out I passed my national HR exam, so I get to use letters behind my name now (CHRP). I also had a very successful tradeshow and nice home party in between now & then. Not to mention Christmas and all that stuff (I am nowhere near done shopping or ready! At least the house is decorated though).
Finally got a chance to play with some new goodies I've acquired. I'll give you a couple cards to look at since I've deprived you all so long :)
This one uses the Morning Cup stamp set & matching wheel. It's so adorable & great for both the caffeine addict or teatotaller in your life! I used NEW Baja Breeze seam binding ribbon, which will be available to customers upon the launch of the new mini catalogue January 4th. I have copies already, contact me if you'd like to start preplanning your purchases! The middle of the ribbon is anchored with a matching Glimmer Brad.
This card is pretty neat if I do say so myself! The shiny looking part is actually a Window Sheet that I ran through the Big Shot in the Vintage Wallpaper embossing folder. It's such a cool effect! I also used the stamp set Just Believe for the tiny blue flower journalling spot. The ribbon is the ever classy Very Vanilla satin ribbon. It's a great ribbon to have on hand since it goes with anything and adds a little shine to any project. The hardware I used is retired, but it matched so well I couldn't resist. Plus, I have GOT to learn to let go of some things and actually use them! To finish it off, I added a little brown sponging to the bottom of the card.
Hope you like these and I hope it's sooner rather than later for my next post!
Merry Christmas to all of you!
Sorry I haven't posted in so long - I have been super busy, but in a good way. I found out I passed my national HR exam, so I get to use letters behind my name now (CHRP). I also had a very successful tradeshow and nice home party in between now & then. Not to mention Christmas and all that stuff (I am nowhere near done shopping or ready! At least the house is decorated though).
Finally got a chance to play with some new goodies I've acquired. I'll give you a couple cards to look at since I've deprived you all so long :)
This one uses the Morning Cup stamp set & matching wheel. It's so adorable & great for both the caffeine addict or teatotaller in your life! I used NEW Baja Breeze seam binding ribbon, which will be available to customers upon the launch of the new mini catalogue January 4th. I have copies already, contact me if you'd like to start preplanning your purchases! The middle of the ribbon is anchored with a matching Glimmer Brad.
This card is pretty neat if I do say so myself! The shiny looking part is actually a Window Sheet that I ran through the Big Shot in the Vintage Wallpaper embossing folder. It's such a cool effect! I also used the stamp set Just Believe for the tiny blue flower journalling spot. The ribbon is the ever classy Very Vanilla satin ribbon. It's a great ribbon to have on hand since it goes with anything and adds a little shine to any project. The hardware I used is retired, but it matched so well I couldn't resist. Plus, I have GOT to learn to let go of some things and actually use them! To finish it off, I added a little brown sponging to the bottom of the card.
Hope you like these and I hope it's sooner rather than later for my next post!
Merry Christmas to all of you!
Thursday, November 18, 2010
Starter Kit Promo
Hi everyone,
For my post today I figured I'd show a card set I made for the tradeshow coming up on December 2nd. Only 2 sets of these will be available to purchase that day. But I will have many, many more cards as well!
Besides cards, I also wanted to mention an incredible deal Stampin' Up has announced regarding becoming a demonstrator! From now until November 30th you can sign up to be a demonstrator and get 50% off your starter kit! The starter kit is jam packed with all the goodies you need to start your business. Or if you just want to get the 20% discount on your hobby, then this is a great way to build your collection quickly and cheaply!
There is over $375 of products that would regularly cost $215, but will now only cost you $107.50! You can either pick the Standard kit or the Digital Plus starter kit. The Digital Plus includes a copy of My Digital Studio.
For more information (or if you don't need to hear anymore, you want to join my team RIGHT AWAY...) contact me today!
Here are only some of the benefits of being a demonstrator:
•Earn additional income while sharing creativity
•Get access to demo only preorders, contests and prizes
•Enjoy access to nearly unlimited creative ideas including an exclusive SU demonstrator only website
•Receive a free subscription to our monthly magazine
•Receive free two-month subscription to your own business website
•Opportunity to earn free products and incentive trips
You know you want to....
:)
For my post today I figured I'd show a card set I made for the tradeshow coming up on December 2nd. Only 2 sets of these will be available to purchase that day. But I will have many, many more cards as well!
Besides cards, I also wanted to mention an incredible deal Stampin' Up has announced regarding becoming a demonstrator! From now until November 30th you can sign up to be a demonstrator and get 50% off your starter kit! The starter kit is jam packed with all the goodies you need to start your business. Or if you just want to get the 20% discount on your hobby, then this is a great way to build your collection quickly and cheaply!
There is over $375 of products that would regularly cost $215, but will now only cost you $107.50! You can either pick the Standard kit or the Digital Plus starter kit. The Digital Plus includes a copy of My Digital Studio.
For more information (or if you don't need to hear anymore, you want to join my team RIGHT AWAY...) contact me today!
Here are only some of the benefits of being a demonstrator:
•Earn additional income while sharing creativity
•Get access to demo only preorders, contests and prizes
•Enjoy access to nearly unlimited creative ideas including an exclusive SU demonstrator only website
•Receive a free subscription to our monthly magazine
•Receive free two-month subscription to your own business website
•Opportunity to earn free products and incentive trips
You know you want to....
:)
Saturday, November 6, 2010
Time to get into Christmas!
Hi everyone!
Since it's already well into November (and I have a tradeshow coming up on Dec.2nd) I am in a big panic to get as much Christmas-y things done as possible! I've made some more of those cute slider boxes that hold tags, but I'm also trying to get lots of cards ready to sell.
Here is one with my favorite Christmas stamp set "A Cardinal Christmas". It's just so much fun to colour in! Now that I finally bought Aqua Painters, it's really fun! I'm still learning how to use the Aqua Painters, so keep in mind my colouring isn't perfect! {But that's what handmade is all about, isn't it?}
The cardstock is Always Artichoke and I used the same colour of seam binding ribbon (from the Holiday mini). I really love this seam binding, it's so easy to work with and it's such a different texture than any of our other ribbons.
The cardinal was stamped in black StazOn ink (a MUST for watercolouring) then coloured in using the almighty Aqua Painters and ink from the lids of the ink pads.
Hope you like :)
P.S. If some of the 'locals' are reading this, contact me for more information on the tradeshow December 2nd. It's going to be huge & lots of fun!
Since it's already well into November (and I have a tradeshow coming up on Dec.2nd) I am in a big panic to get as much Christmas-y things done as possible! I've made some more of those cute slider boxes that hold tags, but I'm also trying to get lots of cards ready to sell.
Here is one with my favorite Christmas stamp set "A Cardinal Christmas". It's just so much fun to colour in! Now that I finally bought Aqua Painters, it's really fun! I'm still learning how to use the Aqua Painters, so keep in mind my colouring isn't perfect! {But that's what handmade is all about, isn't it?}
The cardstock is Always Artichoke and I used the same colour of seam binding ribbon (from the Holiday mini). I really love this seam binding, it's so easy to work with and it's such a different texture than any of our other ribbons.
The cardinal was stamped in black StazOn ink (a MUST for watercolouring) then coloured in using the almighty Aqua Painters and ink from the lids of the ink pads.
Hope you like :)
P.S. If some of the 'locals' are reading this, contact me for more information on the tradeshow December 2nd. It's going to be huge & lots of fun!
Tuesday, October 5, 2010
New Project (as promised!)
Hi everyone!
So now that I'm all done my BIG exam, I have more time to be creative - it feels great - no matter what the exam result may turn out to be!
I'm now starting to get ready for a tradeshow I have happening in my hometown on October 16th. I've decided to make a bunch of bookmarks since they went over so well at my last workshop for my friend Danica.
So both the bookmark and the matching card feature a set from the Holiday Mini called French Foliage. It is gorgeous - the leaves are so lifelife and it also includes a stamp with french script on it for backgrounds. I used the script stamp in Crumb Cake for a background, then sponged all the edges. The leaves are stamped in Cajun Craze, Cherry Cobbler and Wild Wasabi with Soft Suede around the edges. They're both finished off with a couple squirts each of Smooch Spritz in brown and gold. The bookmark also has Always Artichoke seam binding and Chantilly lace at the top, anchored with a vintage brad. The card has a sentiment from the hostess set Afterthoughts.
I really like how they turned out! Definitely a nice fall vibe.
What do you think?
So now that I'm all done my BIG exam, I have more time to be creative - it feels great - no matter what the exam result may turn out to be!
I'm now starting to get ready for a tradeshow I have happening in my hometown on October 16th. I've decided to make a bunch of bookmarks since they went over so well at my last workshop for my friend Danica.
So both the bookmark and the matching card feature a set from the Holiday Mini called French Foliage. It is gorgeous - the leaves are so lifelife and it also includes a stamp with french script on it for backgrounds. I used the script stamp in Crumb Cake for a background, then sponged all the edges. The leaves are stamped in Cajun Craze, Cherry Cobbler and Wild Wasabi with Soft Suede around the edges. They're both finished off with a couple squirts each of Smooch Spritz in brown and gold. The bookmark also has Always Artichoke seam binding and Chantilly lace at the top, anchored with a vintage brad. The card has a sentiment from the hostess set Afterthoughts.
I really like how they turned out! Definitely a nice fall vibe.
What do you think?
Wednesday, September 15, 2010
CASE Closed!
Hi everyone!
Another CASE for you today - as I've been too stressed and busy to be original ha ha. I'm extremely busy at my normal full-time job, keeping busy with Stampin' Up!, plus studying for the MOST IMPORTANT exam of my life in October. My pass on this exam determines if I get my professional designation for Human Resources or not! Wish me luck...
And enjoy my take on a card by Lisa Young - she's another crafter whose work I stalk endlessly :) Her original can be seen at http://addinkandstamp.blogspot.com/2010/08/pull-up-chair-and-relax.html
My card looks like this...
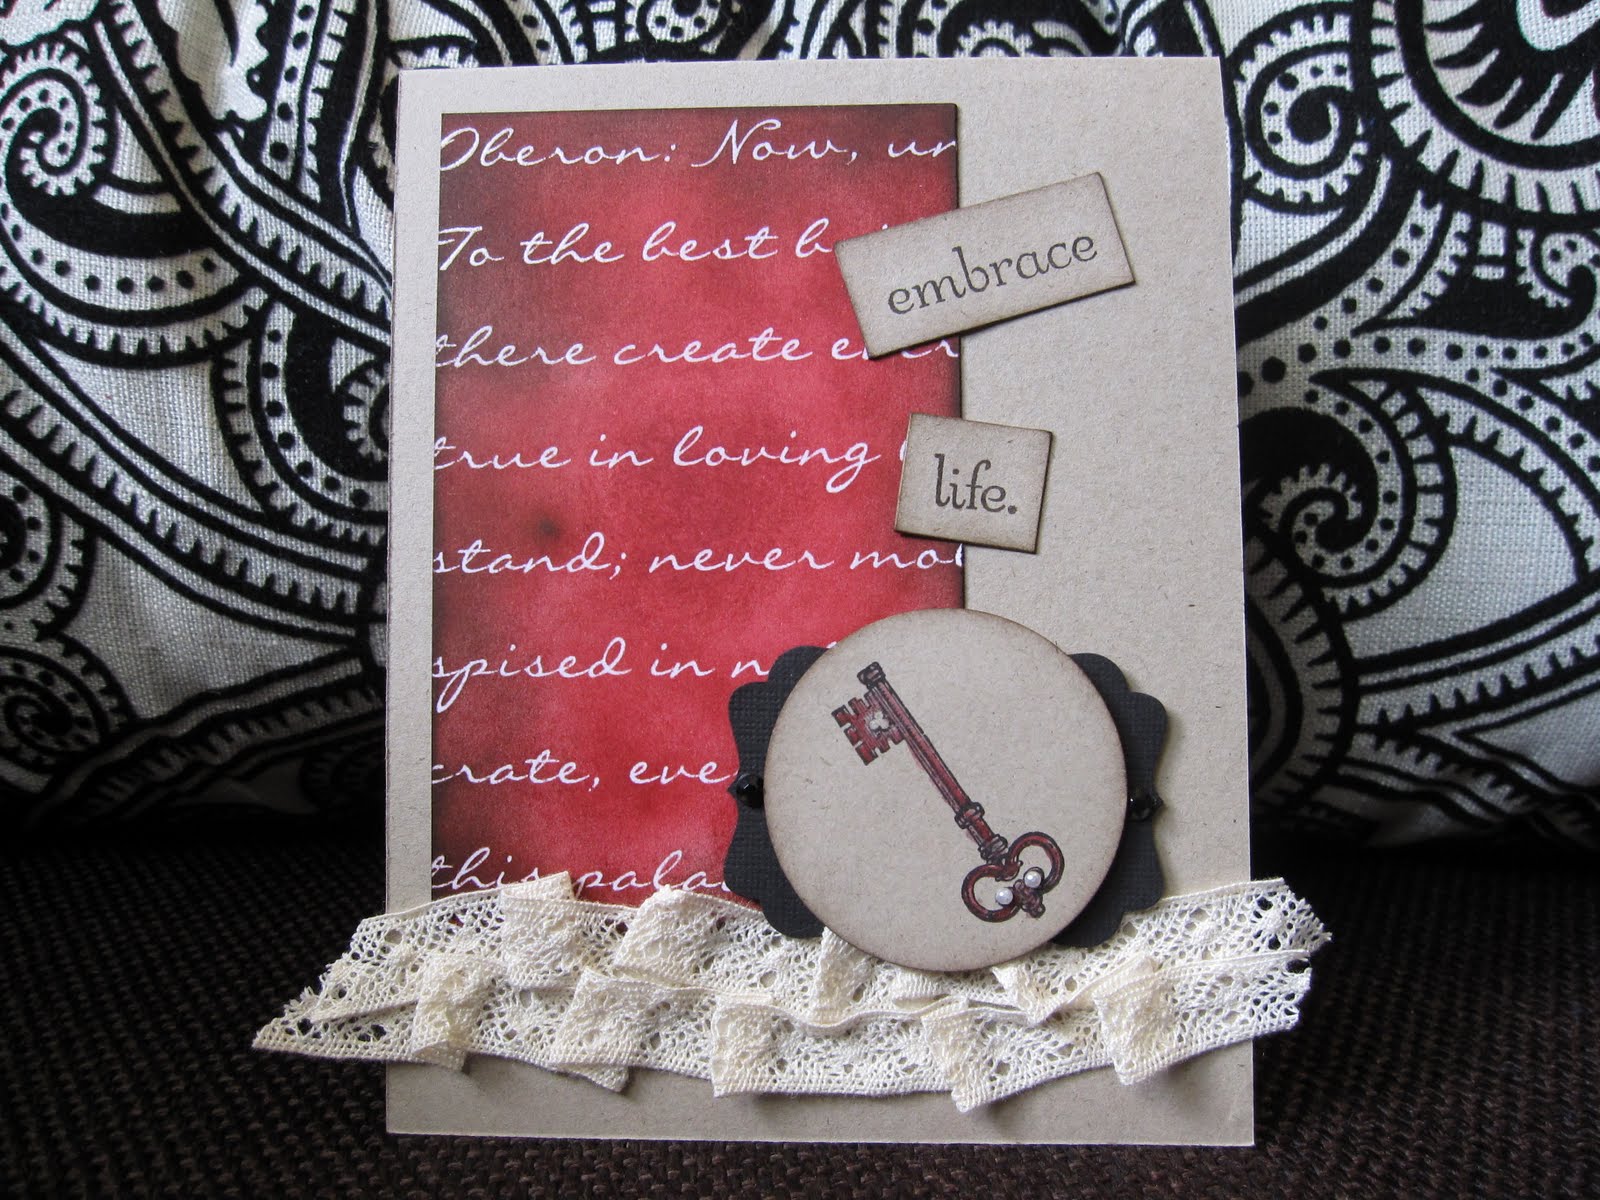
The script paper is actually a piece of the Presto Patterns DSP. It is white with white embossed images that only show up after you ink, spritz, sponge or otherwise imbue the paper. In this case, I sponged heavily with Cherry Cobbler and lightly near the edges with Early Espresso. The key image is from the set Artistic Etchings (love it!) and the vintage lace is the 1/2" Chantilly lace. The key has tiny Basic Pearls on the end of it, and the black punch behind it has tiny black rhinestones from the Halloween section of the Holiday Mini. I love how it all looks together! Thank Lisa, not me :)
Another CASE for you today - as I've been too stressed and busy to be original ha ha. I'm extremely busy at my normal full-time job, keeping busy with Stampin' Up!, plus studying for the MOST IMPORTANT exam of my life in October. My pass on this exam determines if I get my professional designation for Human Resources or not! Wish me luck...
And enjoy my take on a card by Lisa Young - she's another crafter whose work I stalk endlessly :) Her original can be seen at http://addinkandstamp.blogspot.com/2010/08/pull-up-chair-and-relax.html
My card looks like this...
The script paper is actually a piece of the Presto Patterns DSP. It is white with white embossed images that only show up after you ink, spritz, sponge or otherwise imbue the paper. In this case, I sponged heavily with Cherry Cobbler and lightly near the edges with Early Espresso. The key image is from the set Artistic Etchings (love it!) and the vintage lace is the 1/2" Chantilly lace. The key has tiny Basic Pearls on the end of it, and the black punch behind it has tiny black rhinestones from the Halloween section of the Holiday Mini. I love how it all looks together! Thank Lisa, not me :)
Monday, September 13, 2010
Boy Birthday
Hi everyone!
Today I want to show you a birthday card I made for my brother "in law" ... he turns 20 this weekend. Boy cards are always a bit challenging...it's like my mind says "Ok, man colours, man colours this time" but my hands have a mind of their own and reach for the Perfect Plum or Melon Mambo.... "No! Bad!"
So this time I reached to Cajun Craze. Mostly because I felt bad that I was neglecting it. I played with all the other new colours, but poor Cajun Craze sat unused! Not anymore! It is a great colour for boy cards - and to perk it up a little I paired it with circle accents punched from retired yellow cardstock and Pacific Point coloured cardstock. To jazz it up a little more I wound silver elastic cord around the card and added a Designer Brad from the retired star collection. The stars in the background are stamped with Versamark ink. Those stars plus the sentiment that's punched out and popped up with dimensionals is from an old set called Starring You. I'm trying to keep to my promise of using old stuff more often - seriously - this set was unmounted prior to this card, that's how bad I am.
It's fun, funky and not too serious for a 20 year old. Now I have to get to work on my grandma "in law" birthday card... If I get it done tonight, I'll post it, but don't hold me to that :)
Today I want to show you a birthday card I made for my brother "in law" ... he turns 20 this weekend. Boy cards are always a bit challenging...it's like my mind says "Ok, man colours, man colours this time" but my hands have a mind of their own and reach for the Perfect Plum or Melon Mambo.... "No! Bad!"
So this time I reached to Cajun Craze. Mostly because I felt bad that I was neglecting it. I played with all the other new colours, but poor Cajun Craze sat unused! Not anymore! It is a great colour for boy cards - and to perk it up a little I paired it with circle accents punched from retired yellow cardstock and Pacific Point coloured cardstock. To jazz it up a little more I wound silver elastic cord around the card and added a Designer Brad from the retired star collection. The stars in the background are stamped with Versamark ink. Those stars plus the sentiment that's punched out and popped up with dimensionals is from an old set called Starring You. I'm trying to keep to my promise of using old stuff more often - seriously - this set was unmounted prior to this card, that's how bad I am.
It's fun, funky and not too serious for a 20 year old. Now I have to get to work on my grandma "in law" birthday card... If I get it done tonight, I'll post it, but don't hold me to that :)
Sunday, September 12, 2010
CASE - Copy and Share Everything!
Hi everyone! My favorite thing to do when I'm stumped is to surf the blogs of those who inspire me. I always find a card I want to case! What usually happens is I start out thinking "Perfect, I'm gonna copy this entire card EXACTLY" but as I get going it transforms into something else entirely because my own flavour always comes through. This is the beauty of casing! It's a great jumping off point.
Today, my card was inspired by Erica Cerwin. You can see her fantastic blog at http://www.pinkbuckaroodesigns.blogspot.com ... she is great! This is her card....
And this is my card....
My card uses the new paper daisies, which I simply sponged with ink to colour them. The centers are punched from Chocolate Chip cardstock, then covered in Crystal Effects, then sprinkled with Micro Beads. How ashamed I am that I've had Micro Beads sitting in the embellishment drawer for TWO YEARS and not used them! They are awesome - look what I was missing! {Only down size is if you don't prepare your work surface well enough, they WILL run all over the damn place and you WON'T find them again!} I also cut a swirl from the Decorative Strip die and accented with 2 Old Olive brads.
Today, my card was inspired by Erica Cerwin. You can see her fantastic blog at http://www.pinkbuckaroodesigns.blogspot.com ... she is great! This is her card....
And this is my card....
My card uses the new paper daisies, which I simply sponged with ink to colour them. The centers are punched from Chocolate Chip cardstock, then covered in Crystal Effects, then sprinkled with Micro Beads. How ashamed I am that I've had Micro Beads sitting in the embellishment drawer for TWO YEARS and not used them! They are awesome - look what I was missing! {Only down size is if you don't prepare your work surface well enough, they WILL run all over the damn place and you WON'T find them again!} I also cut a swirl from the Decorative Strip die and accented with 2 Old Olive brads.
Here is a close up of the Micro Beads in case anyone is interested:
Hope you like :)
Subscribe to:
Posts (Atom)